Showing posts with label paint. Show all posts

Camper Remodel: This will end eventually, right?

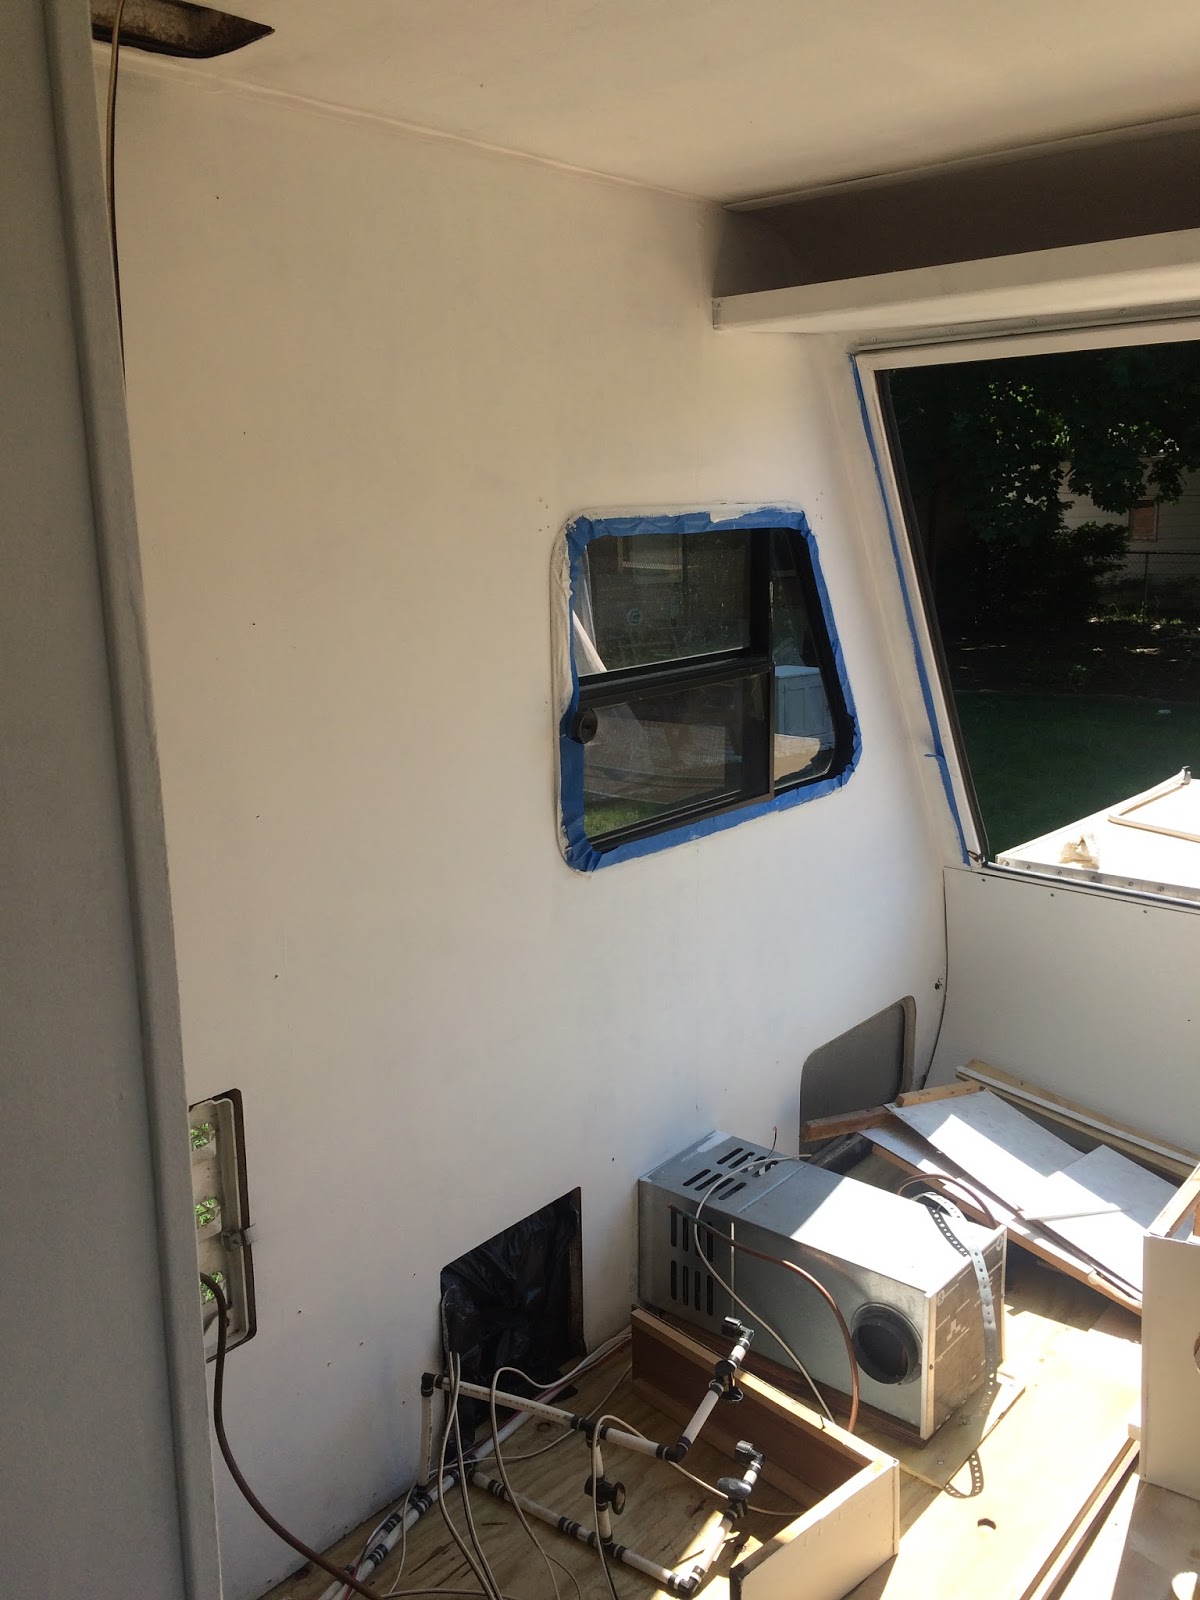
We have owned our lovely camper for about 3 months now, and over the course of those 3 months, have spent nearly every weekend getting it prepped for our big trip to the East Coast over the 4th of July. We have had a lot of fun fixing this thing up, but I will be completely honest and say I am so ready to start camping already! I can only paint fake wood for so long ;)

With that disclosure out of the way, here are some pictures from our weekend. 

1. Peter worked on installing the fridge enclosure while I cleaned out the fridge.  By the way, the fridge kind of smells gross. Like mildewy? Maybe what you'd expect in a 20 year old camper fridge? I've been trying a few tricks, like vinegar, baking soda, etc. I will let you know if something works. 

Camper Remodel: Painting is done!

Just another camper remodel update --- this is pretty much all we are doing in our free time lately (besides some wedding planning) since our trip to the east coast is scheduled to kick off July 1.

I finally painted the interior walls and cabinets. For the walls, I went with Benjamin Moore Edgecomb Gray at 50% strength in eggshell. I actually used the Behr Paint + Primer and had Home Depot look up the Benjamin Moore color and match it.

Camper Remodel: Primed and Ready for Paint

Another week, another camper update. This update is the most fun one yet though. We finally got the gross floor removed and the sub floor down in the body of the camper. This means that I finally got to go in and start priming the cabinets and walls!! I got to work taping off anything that I didn't want to turn white, and then used Glidden Gripper primer on everything. It took me about 4-5 hours to give everything a first coat of primer. 

(before)
(after first coat of primer)


(before)
(after)


Posing for a photo paint brush in hand. Peter spent the afternoon fixing the molding around the door and putting it back on. (not shown - paint EVERYWHERE all over me)

(Gracie's new cuddle friend = the Shop Vac)


 So fresh and clean!
Next weekend is Memorial Day weekend, so we are hoping to have 3 nice days to do some major work! The end is in sight :)

Camper Remodel: Painting Cabinets

Progress continues with the camper. This week we took the first step in replacing the floor that we had to take out due to severe rotting :(


While Peter was doing that, I got busy removing the cabinets, priming, and painting. I used the oil-based Zinsser primer, which I brushed on initially. After doing several of the cabinet pieces, I ended up buying the spray paint version which went on a million times faster.  I am interested and hopeful with how it will hold up on those lovely laminate cabinets!
(My station all set up as I primed)

I found a really nice shade of white/off white, which is White Dove by Benjamin Moore. This is the shade I am using on the cabinets, although I don't have pictures yet of them all finished with that shade. 

Finally, I laid out all of the hardware and primed and spray painted it with a nice oil-rubbed bronze.
Above is what the rusty/off colored brass handles looked like before spraying! 

My raised Jenny Lind bed: A year later

A year ago, I wrote about finding an antique Jenny Lind bed and raising the headboard to a more standard headboard height of about 52 inches. The bed has been finished and in my house for over nine months.. I think it's about time to post a few pictures!

The bed turned out great and has held up exceedingly well. I am currently using it in my guest room, which is not quite decorated at the moment, but definitely serves its purpose.  


If you recall, this is how the headboard previously looked. It was too short to use a box spring, and it needed a bit of TLC.

Here is how the headboard looked during the refinishing process:


And this is it now. 

Camp Ave & the technicolored dream house

The exterior of the house is sad, in a chipping-paint, leaning-sideways-porch kind of way. Of course, there are a lot of grand plans that we have for the exterior, but they have not been the priority. However, we have been thinking about paint colors. We have been hoping for a mud color--something darker than the current color, but not too dark. Possibly with a hint of green.

So obviously, we had to try out a bunch of colors...on the front of the house. 

We tested several colors. On the left side, from top to bottom, is 1) Benjamin Moore Victorian Garden at half strength; 2) B.M. Senora Gray at double strength; 3) B.M. Victorian Garden.  On the right, I am not quite sure of the colors--one of them is Sherwin Williams Curio Gray, and the light green shade is Senora Gray by B.M. at regular strength. 

Up close, we really liked the Victorian Garden at half strength. It has the green tones, and was not super dark. 

So my parents decided to paint the whole front of the port part in order to see how the color looked and to cover up that patchwork. 
At this point I was really liking it!

So the next day, I came back during my lunch break to check on the house. I was shocked, I seriously could not see the difference between the old light color and the new! In the pictures, it is visible (albeit BARELY visible). 

(hello, color, are you there???!!)
So in the end, Victorian Garden at half strength is probably not going to work. It is a tad too light, and we want to see a bit of a change...something a few shades darker. Not too dark, but not this light tan. My suggestion was getting the Victorian Garden at 75% strength? 
At least the front porch looks a lot better now that the paint patchwork is cleaned up! 

Have you ever painted a stucco house? If yes, did the paint dry a lot lighter than you expected?