Showing posts with label renovation. Show all posts

Camper Remodel: This will end eventually, right?

We have owned our lovely camper for about 3 months now, and over the course of those 3 months, have spent nearly every weekend getting it prepped for our big trip to the East Coast over the 4th of July. We have had a lot of fun fixing this thing up, but I will be completely honest and say I am so ready to start camping already! I can only paint fake wood for so long ;)

With that disclosure out of the way, here are some pictures from our weekend. 

1. Peter worked on installing the fridge enclosure while I cleaned out the fridge.  By the way, the fridge kind of smells gross. Like mildewy? Maybe what you'd expect in a 20 year old camper fridge? I've been trying a few tricks, like vinegar, baking soda, etc. I will let you know if something works. 

Dining room transformation

The dining room renovation is nearly complete. It is not yet decorated, but that part may take awhile. The dining room took forever to get finished because not only was there water damage in the ceiling that needed fixing, but there was also a set back where we had to take down the ceiling to change the pipes to be up to code. 


BEFORE:
These two pictures are from when we first got the house; untouched color and everything.


DURING RENO:

It became clear that the ceiling would need major work. It was wavy, cracks, uneven--just bad. My dad took on the project himself (I helped here and there where I could). We also traded out the old knob and tube electric for modern electricity ;)


After we got the ceiling drywall up for the second time, it was time to mud the drywall and paint. With the holidays, this project took longer than expected (common theme?) and so this was the view to the dining room for awhile.
The place was sealed off and paper on the floor. I think the dining room had paper on the floor for... 5 months? It was a long and never ending project

AFTER:
Over the past two weeks, we finished painting the room and hung the chandelier. The room looks great. I spent some time cleaning the floors too.

Decorating has not really started yet in this room and I think it will be awhile, but it's nice to have somewhere to sit and eat!

Laundry room (before)

The title to this post is a little deceiving because there is no "after" yet. The laundry room is completely in the "before" stage. I know better than to jump into a million projects a once... but this laundry room can be spruced up quickly and for cheap in my very honest (and very OVER this room) opinion. So here is the tour of the lovely room. 

Entering the laundry/utility room, you see a cinder block wall, a bunch of old pipes, insulation, and dirt!
 I have all my stuff shoved to one side of the room because the other side literally has dirt on the ground.. Can't clean it till I can get those pipes out.

 I bought the washer and dryer myself off of Craigslist. They aren't perfect... a few scuffs and a couple quirks.. but I felt so proud buying them. It felt like my official crossing over to grown-up land. I can't say I like the look of the wood over the window, but my dad says it serves a purpose so I wouldn't want to mess with that!! ;)
 Pipes and dirt.
 This is the wall opposing the washing machine. It is probably my favorite part of the laundry room because it is a fresh slate. After the walls get a coat of fresh white paint I think the place will start looking a lot better. Maybe add art or a chalkboard paint design? Got the indoor-outdoor rug from Marshalls last weekend for $79. Its a 5x7, thought that was a pretty decent deal!

This is the utility side of the room. Besides covering the area up with sheets or curtains, I think I will have to just pretend that this part of the room doesn't exist?

Bathroom update

The bathroom is one of the most finished rooms in the house (although its not completely done...its use-able and you can get a good idea of where its going).

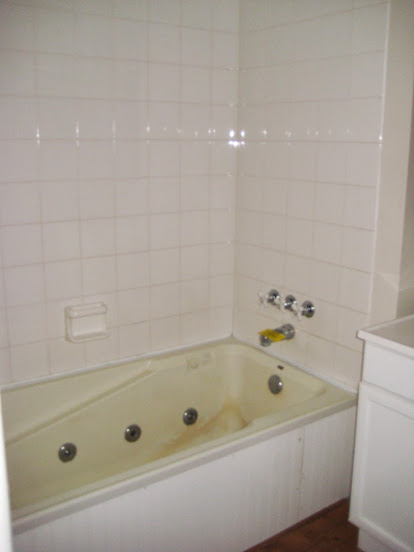
So let's take a look at the "before" pictures. Hole in the wall, old electric, vanity was okay but nothing special, small dirty toilet, and wood planks on the ground covering up layers of chipped up tile. 


There was a jet tub, but it was leaking through to the dining room below. All dirty. White square tiles.

Here is the bathroom now.  The bathroom was completely gutted and re-tiled. There is subway tile in the bathtub, carrara marble 12 x 12 marble on the floor, a new vanity and faucet, new lighting, new toilet, new mirror. The walls were painted edgecomb gray by Benjamin Moore. 


Its difficult to get a good picture in this room because there are no windows in the area, so forgive me for the overblown lighting shots. 

I got the shower curtain from West Elm. I am really liking it!


It's a small bathroom but it gets the job done! This is the only room so far that we've hired help for. The reno is going slow, so we decided to hire a local guy to do the tile, and he did a great job.

DIY Porch Urns

I had been looking for two black urns for a few months for the front porch, but nothing was cheap enough catching my eye. I ended up spotting two stone-like urns at Gordmans that were the perfect size, and I knew with a little spray paint they could be perfect for my front porch. I didn't notice that one of the urns had a little chip in the back making it only $9.99, so the two urns were around  $40 total (originally $29/ea)! 


My mom has a space in her basement dedicated to spray painting (she refinishes furniture for a living), so we set these in there and she helped me get them all covered. I used Rustoleum's Oil Rubbed Bronze. I didn't use a primer beforehand because the material of the urns was fine without it. 

And here is one finished! I love how they turned out. 

It was actually snowing in this picture if you can see!
Happy Holidays!


Progress in the bathroom

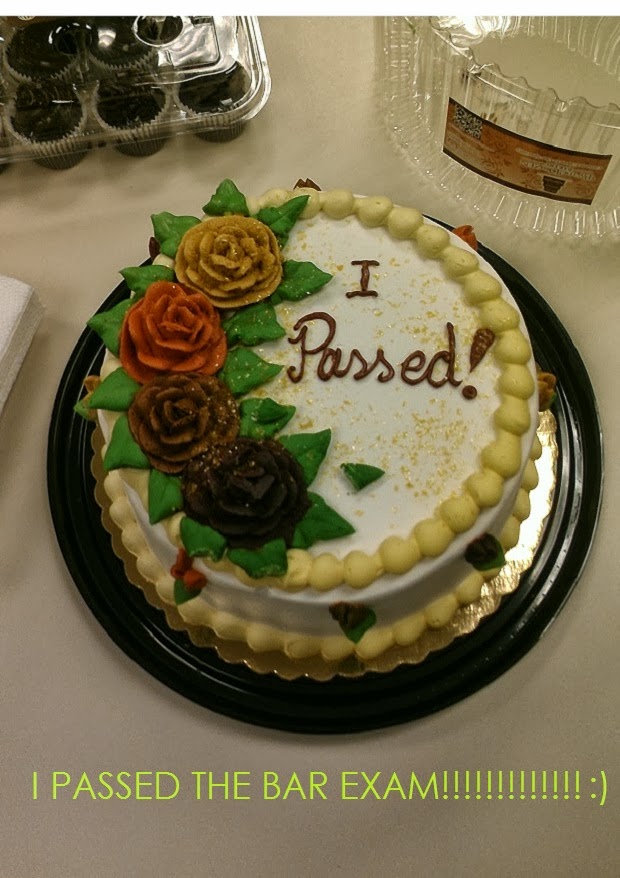
Brief update! Who knew being a lawyer and renovating a house would make me so busy ;)? We got the bathroom tiled this week! Looks great, although we don't have a counter top for the vanity and the toilet isn't installed. When the project is done, I will post better pics with details. For now, here is a little photo grid with the transformation. 
Happy holidays!

Before and After: House Painted

This title is a little deceiving. We finished painting the front of the house. We will be working on the sides as time permits. Luckily, the body of the house has a similar light shade, so it is not immediately noticeable that the sides of the house aren't painted. 

The front of the house was painted with one color: Benjamin Moore Victorian Garden. The body of the house was painted at 50% strength, and the top peak of wood siding was painted with 100% strength. 


I absolutely love the color. We were a bit worried it would look super green, but it is a greige-y green and its perfect! Here are a few more photos of the process:


We also hope to add some dark shutters to bring in a little contrast. Possibly black or a very dark charcoal gray. 

All in all, very happy to have this part of the house painted so that more of the focus can be returned to the inside. More details to come :)

OH MY GOSH

Camp Ave & the technicolored dream house

The exterior of the house is sad, in a chipping-paint, leaning-sideways-porch kind of way. Of course, there are a lot of grand plans that we have for the exterior, but they have not been the priority. However, we have been thinking about paint colors. We have been hoping for a mud color--something darker than the current color, but not too dark. Possibly with a hint of green.

So obviously, we had to try out a bunch of colors...on the front of the house. 

We tested several colors. On the left side, from top to bottom, is 1) Benjamin Moore Victorian Garden at half strength; 2) B.M. Senora Gray at double strength; 3) B.M. Victorian Garden.  On the right, I am not quite sure of the colors--one of them is Sherwin Williams Curio Gray, and the light green shade is Senora Gray by B.M. at regular strength. 

Up close, we really liked the Victorian Garden at half strength. It has the green tones, and was not super dark. 

So my parents decided to paint the whole front of the port part in order to see how the color looked and to cover up that patchwork. 
At this point I was really liking it!

So the next day, I came back during my lunch break to check on the house. I was shocked, I seriously could not see the difference between the old light color and the new! In the pictures, it is visible (albeit BARELY visible). 

(hello, color, are you there???!!)
So in the end, Victorian Garden at half strength is probably not going to work. It is a tad too light, and we want to see a bit of a change...something a few shades darker. Not too dark, but not this light tan. My suggestion was getting the Victorian Garden at 75% strength? 
At least the front porch looks a lot better now that the paint patchwork is cleaned up! 

Have you ever painted a stucco house? If yes, did the paint dry a lot lighter than you expected? 

Entryway is painted!

The entryway has finally been painted and the new light is hung. It has been a long time coming because of the repairs and because we have gotten distracted on several other projects. 

Before:
Here is a before picture from how the house looked before we bought it. The floors and wood detail are beautiful, but there was a LOT of work to be done on the plaster. Cracks everywhere. We also got rid of the random "chair rail" near the ceiling. 

Here is the view from the front door. Unfortunately the floral carpet has not yet been ripped up. We are waiting to do that until the end so the floors don't get damaged. We aren't too worried about spilling plaster or paint on this flowered beauty. 

During
Here are some photos of the renovation process. The walls got patched up and we put down painters paper so we don't damage the wood floors while we are doing all of the repairs. 

Stairway walls had to be entirely removed and re-drywalled. 


 My sister came and helped with the painting :)

After
Paint on the walls and light is up. I kept going back and forth about this light, but since we waited so long to hang it up, I can't return it and therefore it IS my light. No negative comments because it is staying! (kidding...kind of?). We painted the entryway with Benjamin Moore Revere Pewter. It was actually Behr Paint + Primer tinted to that color, and luckily we only needed one coat of that! 

 Gracie had to inspect everything, and she approves. 

 I got the chandelier from overstock (here). 
I'm so happy to be done painting the entryway. We needed to have a room that was nearly complete because everything else is gutted and ugly and it was getting kind of depressing. Now we walk in the front door to fresh paint and a light!